Whether you’re a small business just starting out or an established company looking to grow your online presence, a professional website is key. There are many ways to create a website, but WordPress is one of the most popular options due to its versatility and customization options. In this WordPress Website Guide, we’ll show you how to create a WordPress website in just nine easy steps.
Table of Contents
WordPress Website Guide in 9 Easy Steps (2026)
1. Get Web Hosting & a Domain Name
The first step in creating a WordPress website is web hosting. WordPress is a free website builder, but you need to use a web hosting service to make your website available on the Internet. Usually, this costs less than $10 per month. Taking care of the web hosting first will save you time and money, because the best WordPress hosting services include a free domain name as well as a one-click WordPress installation, which makes creating a WordPress website much easier.
Choose a Domain Name
If you have chosen a web hosting plan that includes a free domain name (e.g. businessname.com), such as DreamHost, then you will be asked to choose a domain when you register your account. If this is not the case, purchase a domain name directly from one of the best domain name registrars, such as GoDaddy or Google Domains, and then connect your domain name to your web hosting service manually.
Keep the Following in Mind When Choosing a Domain Name:
- The Shorter, the Better.
- Avoid Numbers & Hyphens.
- Try to Stick with .com, But there are Other Good Options.
- Avoid Trademarked Names & Copyrighted Material.
- Make Sure the Domain is Available.
- Don’t use Words That are Difficult to Pronounce or Spell.
For more information, see Choosing a domain name for your organization.
Install WordPress
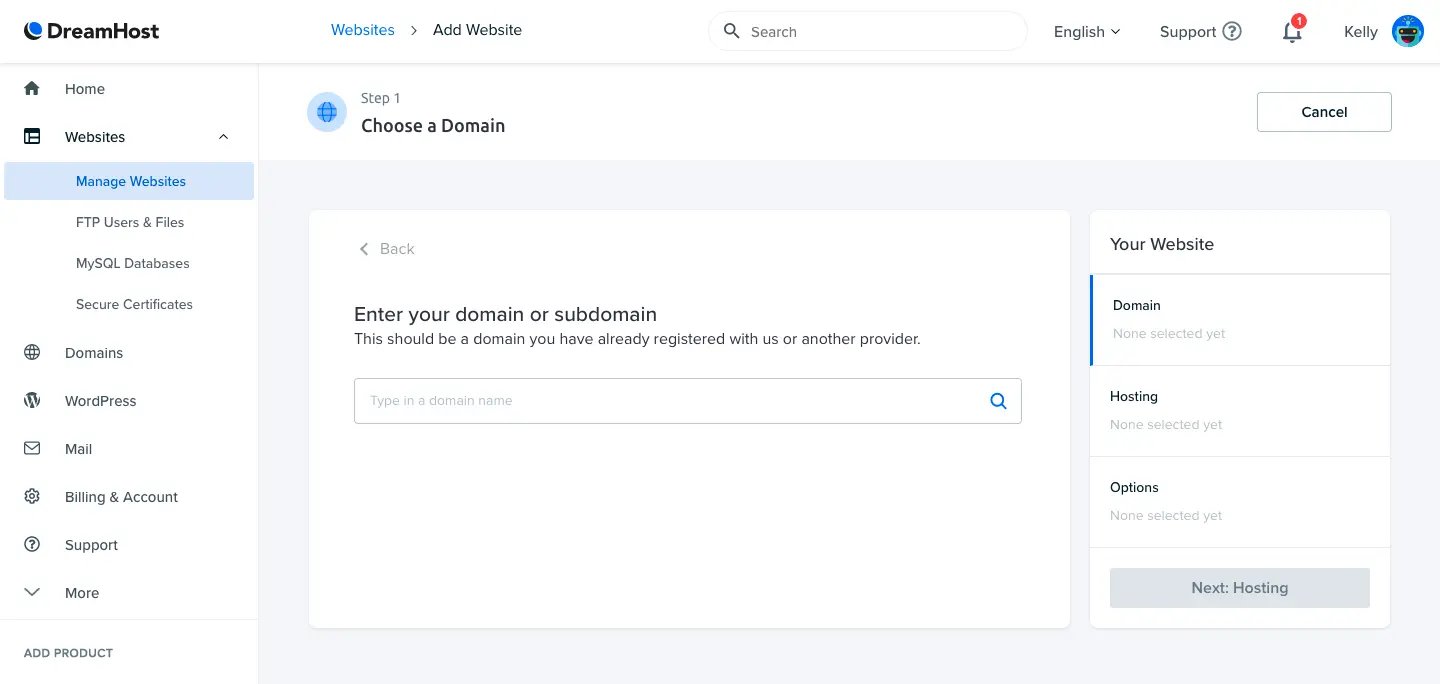
After you purchase a web hosting plan, for example, from our favorite DreamHost, you need to install WordPress (i.e. connect your web hosting service to WordPress).
To do this, go to your user dashboard (or cPanel), navigate to “Websites” in the left vertical menu, and then click “Manage Websites.” From there, find the website you want to create, click “Manage,” and then click “Install WordPress“.
Note that this process can take a few minutes and the steps vary slightly depending on your web hosting provider.
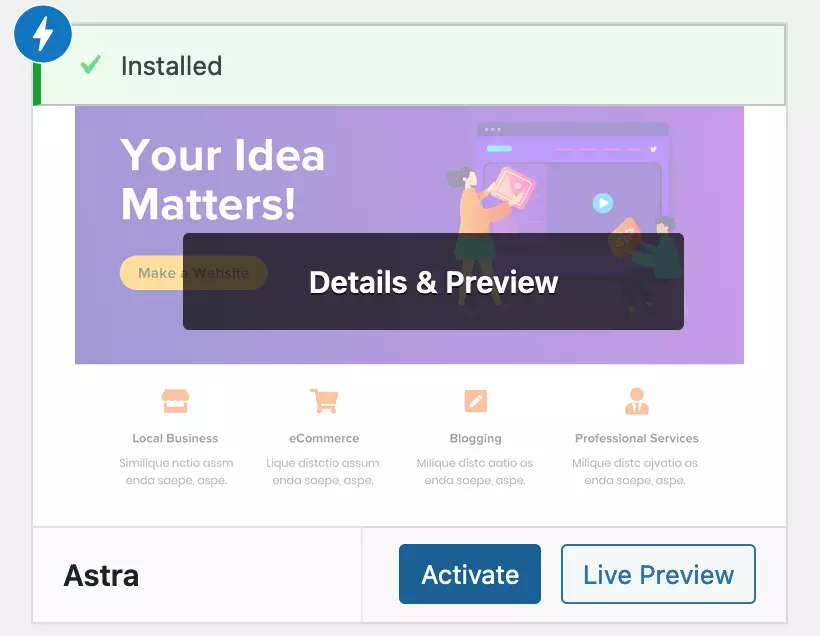
2. Find & Install a WordPress Theme
In the world of WordPress, a theme is a website template. It determines how your website looks, how it works, and what it’s capable of. You can browse and purchase premium templates on sites like ThemeForest. So it’s worth investing the time upfront to find a template that best suits the website you want to create. Once you find the best theme for you, buy it and then download the theme files.
Also, you can get free themes from WordPress. However, they often require a lot more work, so it usually makes more sense, in the long run, to invest in a well-designed premium theme.
Here’s How to Install a Premium WordPress Theme:
3. Install Plugins
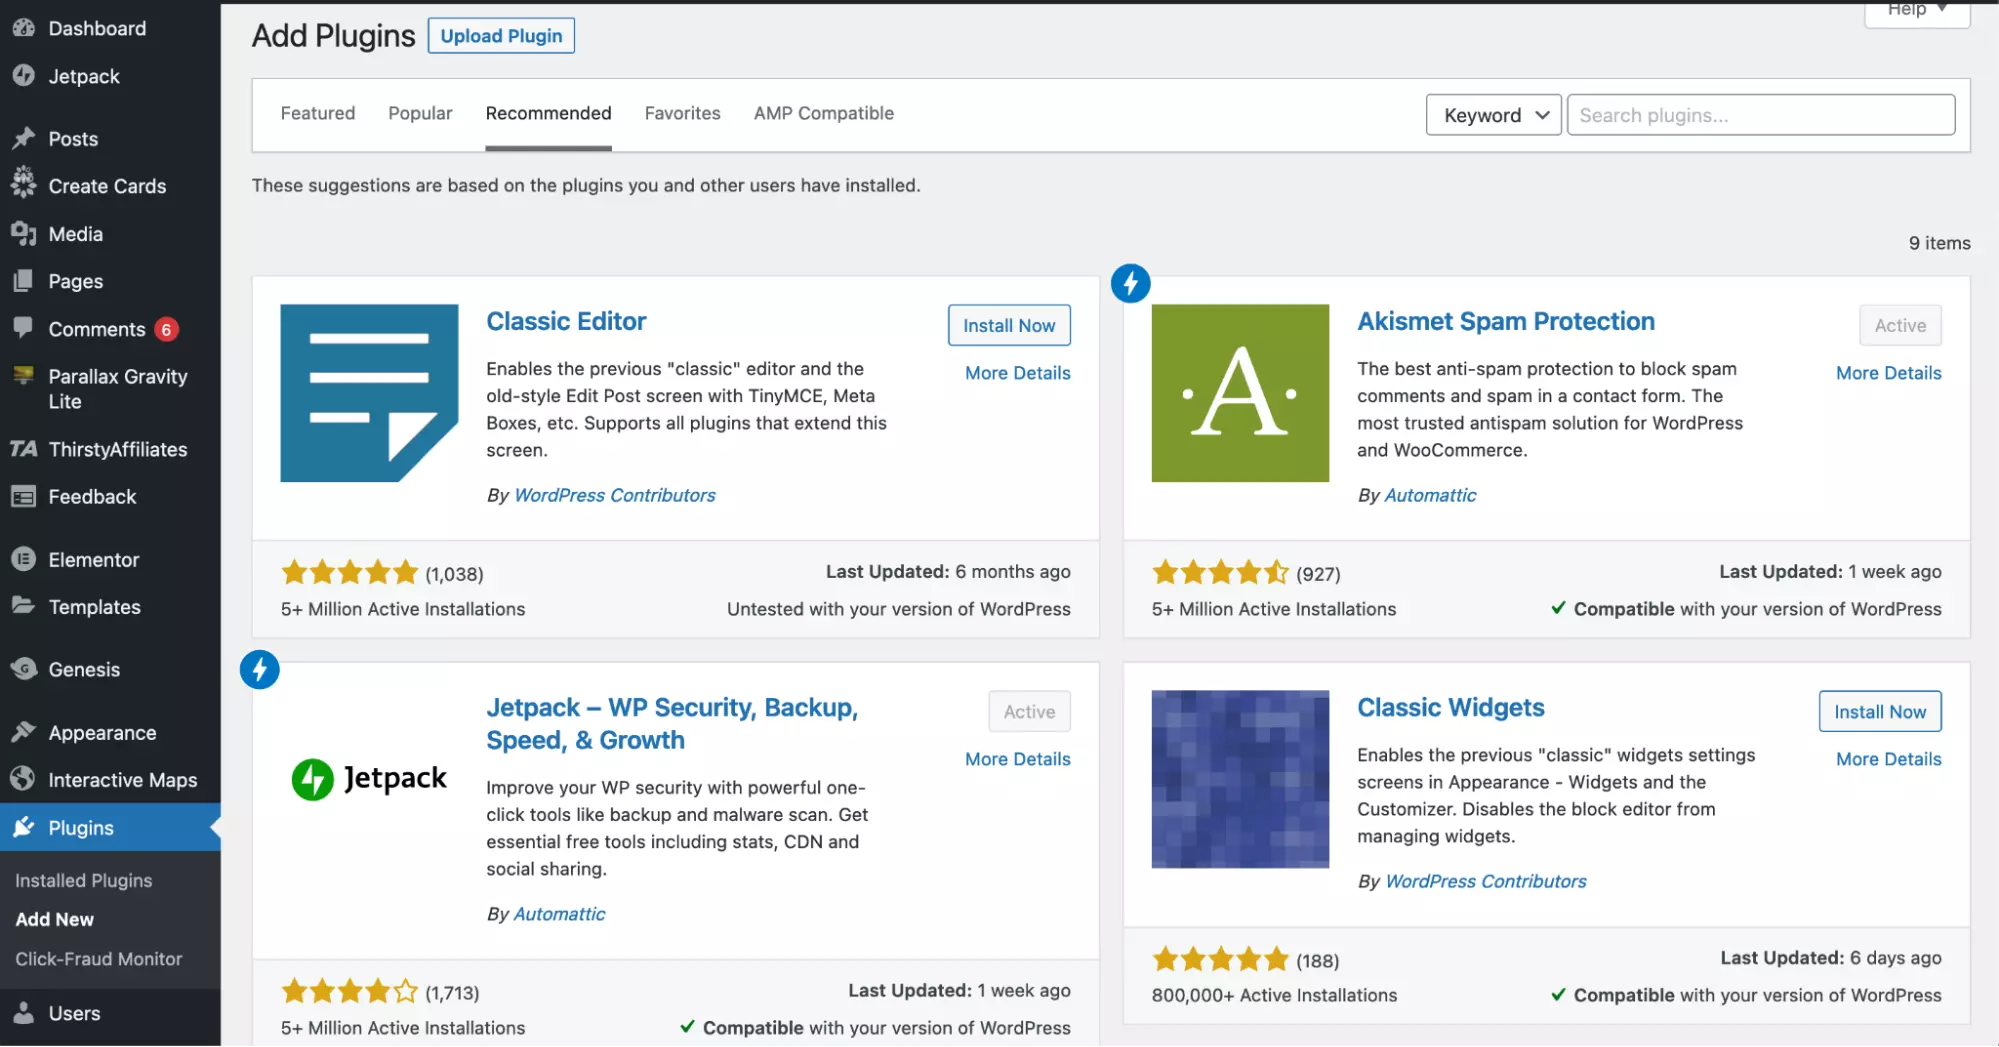
After installing your theme, the next thing you need to do is install and activate any necessary plugins that will allow you to extend the functionality of WordPress. In addition to the plugins that come with your theme, there are thousands of plugins that can offer everything from improving your site’s security to adding a live chat or turning your page editor into a drag-and-drop editor. However, try to limit the number of plugins you use, as too many can slow down your site or cause other plugins to fail.
For Example, We Recommend the Following Plugins for Any Business Website:
How to Install WordPress Plugins:
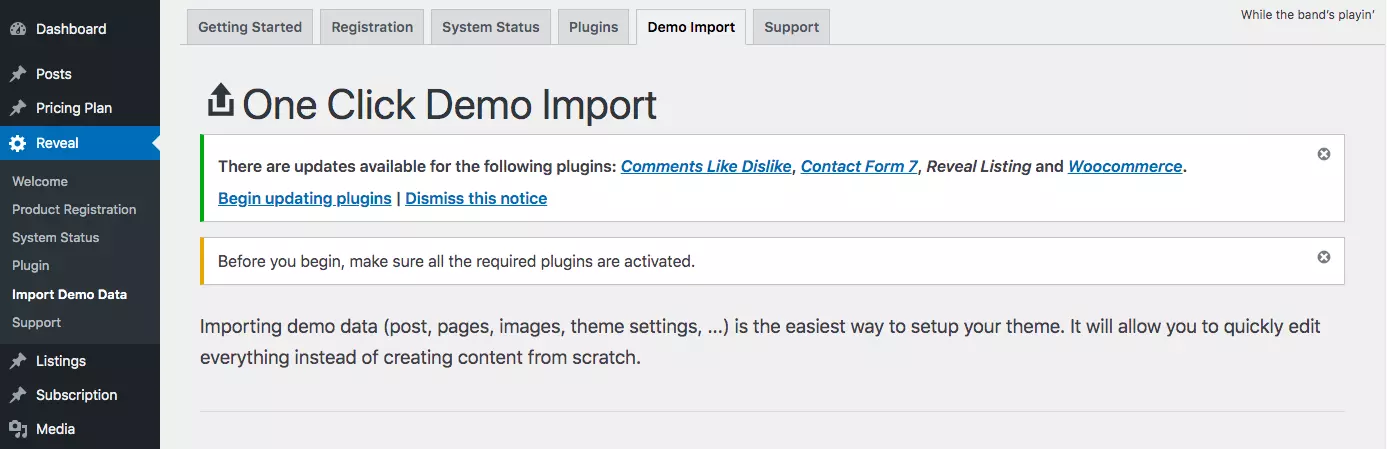
4. Import Demo Content (Optional)
If you have chosen a premium theme, you should import the demo content of your theme. Without the demo content, it’s much harder to build your website because it has the plugins, styling, and features of the theme, but none of the pre-built web pages.
The process of importing demo content varies depending on the theme. Often, after installing your theme, you will see a tab with the name of your theme in the left vertical menu. This is usually where the demo content is located. If you don’t find it there, refer to your theme’s documentation on how to import demo content. You can usually find it along with your theme’s files (from the vendor you bought it from).
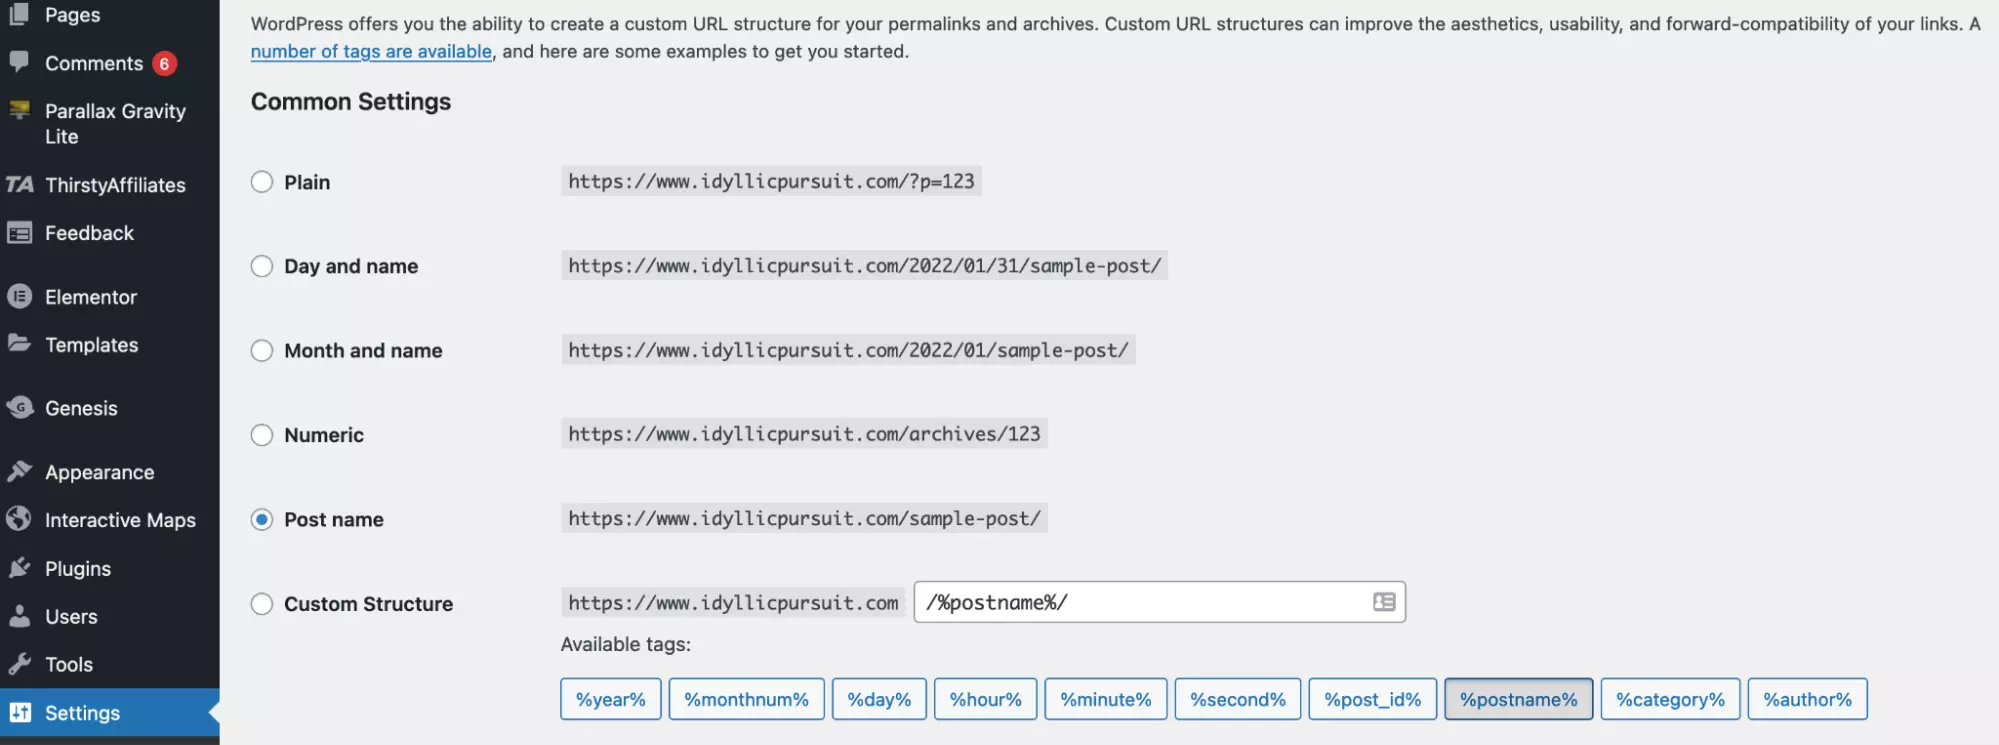
5. Configure WordPress Settings
Before you start customizing web pages and creating website content, you need to configure your settings, such as specifying the home page and blog posts page and updating your website name, tagline, and website icon.
The Following Describes How to Configure the Most Commonly Used Settings:
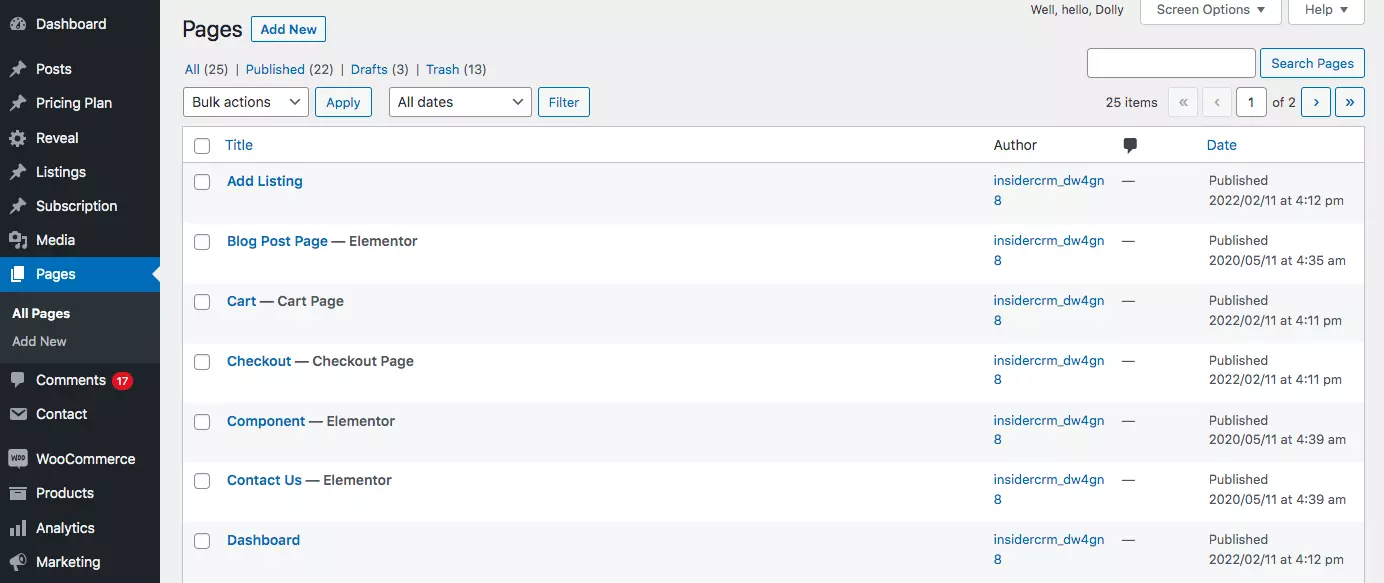
6. Create Pages
Now is the time to start creating your web pages that makeup websites. For example, the average business website includes a number of pages, such as the home page, services, pricing, information, and contact. In WordPress, any page that is not a blog post (or article) is considered a page.
Here’s How to Create &/or Customize Pages in WordPress:
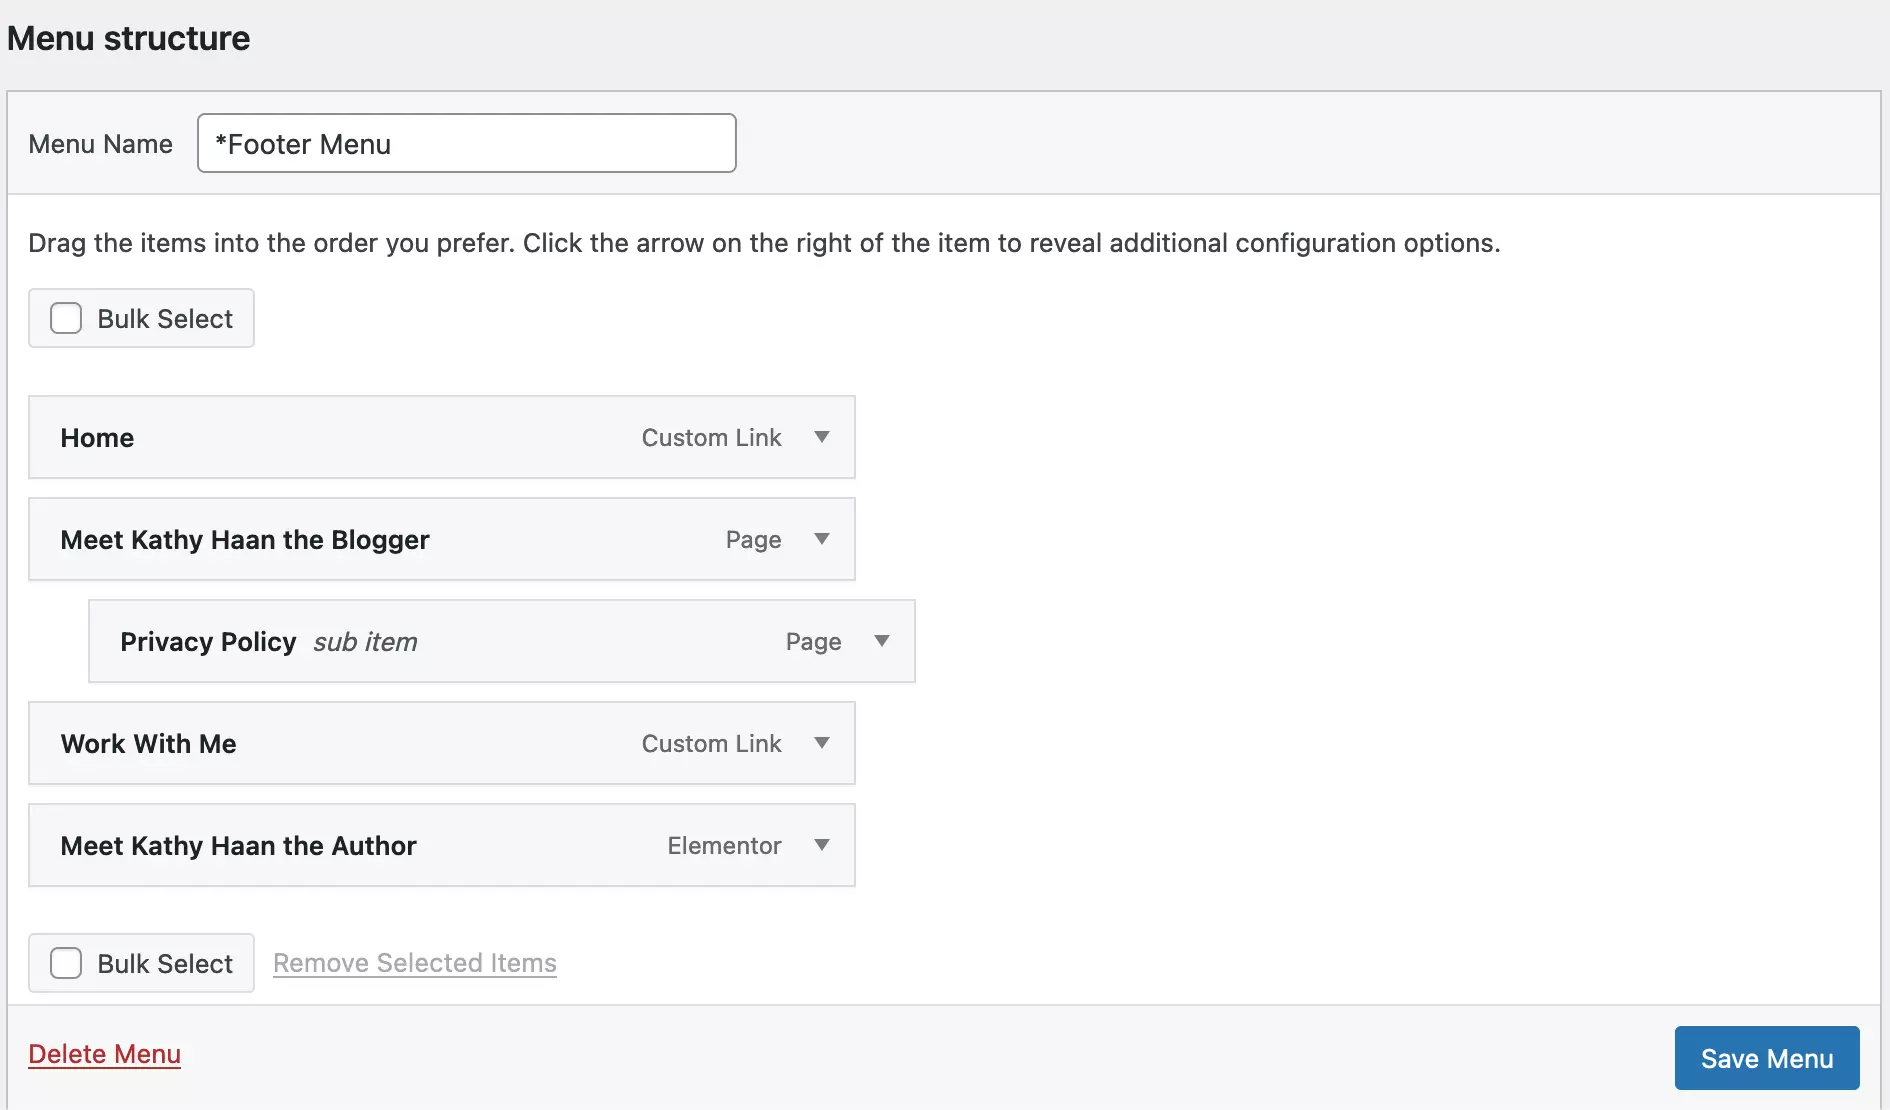
7. Set Up Your Menu
Now that you have your pages set up, create and configure your menu. This is how visitors navigate through your website, and depending on your theme, you may have more than one menu (for example, one menu at the top of the website and one in the footer).
To Configure your Website Menu:
Once you’ve set up your menu, scroll down the same page and find the “Menu Settings” section. Under “Display Location,” check the box next to “Primary.” This sets the menu as the main menu of your website, which will be displayed in the header.
8. Write Your First Blog Post (Optional)
In addition to web pages, many companies also opt for blog posts to increase the likelihood of being found in search engines like Google. To write a blog post, go to “Posts” in the left vertical menu and click “Add New“. From there, you can edit the blog post just like a web page. One difference is that, unlike a page, you can write a blog post and then schedule it for publication at a later date.
Here’s how to Create a Blog Entry in WordPress:
If your blog posts are not showing up on your website, you may need to check that you have specified your blog page in WordPress. To do this, go to “Appearance” > “Customize” > “Homepage Settings.” There, search for “Post Page” and select the page you want to specify as your blog.
9. Market Your Site
Last but not least, you should plan to market your website. The reason for this is that websites don’t necessarily work on a “build it & they will come” basis. Businesses that are found online are the ones that have invested in a variety of website marketing strategies to help their website gain more visibility online, which in turn will drive traffic to your website.
Here are Some of the Most Effective Ways to Market your Website:
The best way to market a website is to use a variety of these strategies to give your website maximum exposure and the best chance of being found online.
WordPress Benefits
WordPress is the most popular blogging platform, used by over 43% of internet users. It is so popular for a reason. It is used to create websites, blogs, complex portals, corporate websites, as well as applications, with tremendous flexibility and customization options.
The WordPress.org software is free and open source, which makes it a programmer’s dream. WordPress is also supported by a large community of developers and users who are constantly creating new plugins, widgets, themes and other goodies to improve the experience.
Conclusion
In summary, creating a WordPress website is an accessible and rewarding journey that will help you bring your online presence to life. If you follow the step-by-step guide described in this article, you’ll have learned the essential elements required to successfully create a WordPress website.
From choosing a domain name and hosting provider to installing and customizing your WordPress theme, you now have the knowledge and tools to create a visually appealing and functional website. With the wide selection of plugins and themes available, you can extend the features of your website and create a customized user experience.
Remember to optimize your WordPress website for search engines, update your content regularly, and take effective security measures to ensure a smooth and secure online presence. Thanks to WordPress’ user-friendly interface and extensive community support, you’ll have the resources to continually improve and expand your site as your goals evolve.
Now it’s time to embark on the journey of creating your WordPress website. Take advantage of WordPress’ creativity and flexibility, experiment with different plugins and design elements, and enjoy building a professional and engaging online presence.
FAQ’s
Is There Any Difference Between WordPress.com & WordPress.org?
Yes, there are several differences between WordPress.com and WordPress.org. The main difference is that WordPress.com is fully hosted, while WordPress.org is self-hosted.
Can a Beginner Create a WordPress Website?
Yes, while WordPress is often used by developers to create very complex websites, beginners can also use WordPress. It’s not the most beginner-friendly CMS, but with a little time, anyone can learn how to use it. And because it’s such a popular CMS, there’s a lot of free information on the Internet to help you create a WordPress website.
Can I Create a WordPress Website for Free?
It is possible to create a WordPress website for free. However, if you want to use your own domain name instead of a subdomain (for example, businessname.wordpress.com), you will have to pay for hosting. Granted, hosting is affordable at around $3 to $10 per month, so it’s a small price to pay to appear professional and credible.
How Much Does It Cost to Create a Website With WordPress?
The cost of creating a WordPress website can vary widely and depends on a number of factors, such as whether you create the site yourself or hire a web designer, your hosting needs, and the cost of themes and plugins. An average small business willing to invest the time to learn how to use WordPress can build its own website for as little as about $100 using just a premium theme (typically between $25 and $80) and a web hosting plan (between $3 and $10 per month).
How Scalable Are Website Builders?
Website builders are highly scalable, and your plan can easily be adjusted to meet the needs of your growing team. If you outgrow even the top package of your service, many providers offer enterprise-level features at custom prices. It may be worth contacting your system’s customer service department to learn more.
Which is Better. WordPress or Wix?
WordPress is generally the better choice for website builders with technical experience or for larger websites that need more flexibility. Wix is a good choice if you want a website builder with no code and a drag-and-drop editor. However, you can also create a simple website with WordPress templates.
Alex Colt is a tech blogger who is deeply passionate about technology. He writes on an array of subjects ranging from the latest smartphones and laptops to the newest gadgets and consumer electronics. Alex’s blog simplifies complex technological concepts into easy-to-understand language, providing insights into the tech world. Furthermore, he shares useful tips and tricks for maximizing the use of devices and staying abreast of the most recent trends. Alex’s unwavering commitment to educating his readers about the ever-evolving realm of tech has made him a respected and trustworthy figure in the tech community.
To read more similar articles, click here.
Thanks for visiting our Website. If you appreciate our work, kindly show us some support in our comments section 🙂